Houndstooth is a web editor for your Github project.
It allows you to create, update, or remove content on your github repo site from any browser. It has two modes: a structured content editor, and a file editor.
The content editor is designed for use with Jekyll. It's ideal for content that changes often, marketing copy, blog posts, and content with a similar format that is frequently repeated. The file editor allows for more advanced formatting with HTML or Markdown.
Similar to other Jekyll collection editors, Houndstooth uses collections to make it easy for web developers to customize the editing interface for clients and non-technical collaborators.
This guide will show you how to do structure your Jekyll project for use with the Content Editor, and access the File Editor.
How it Works
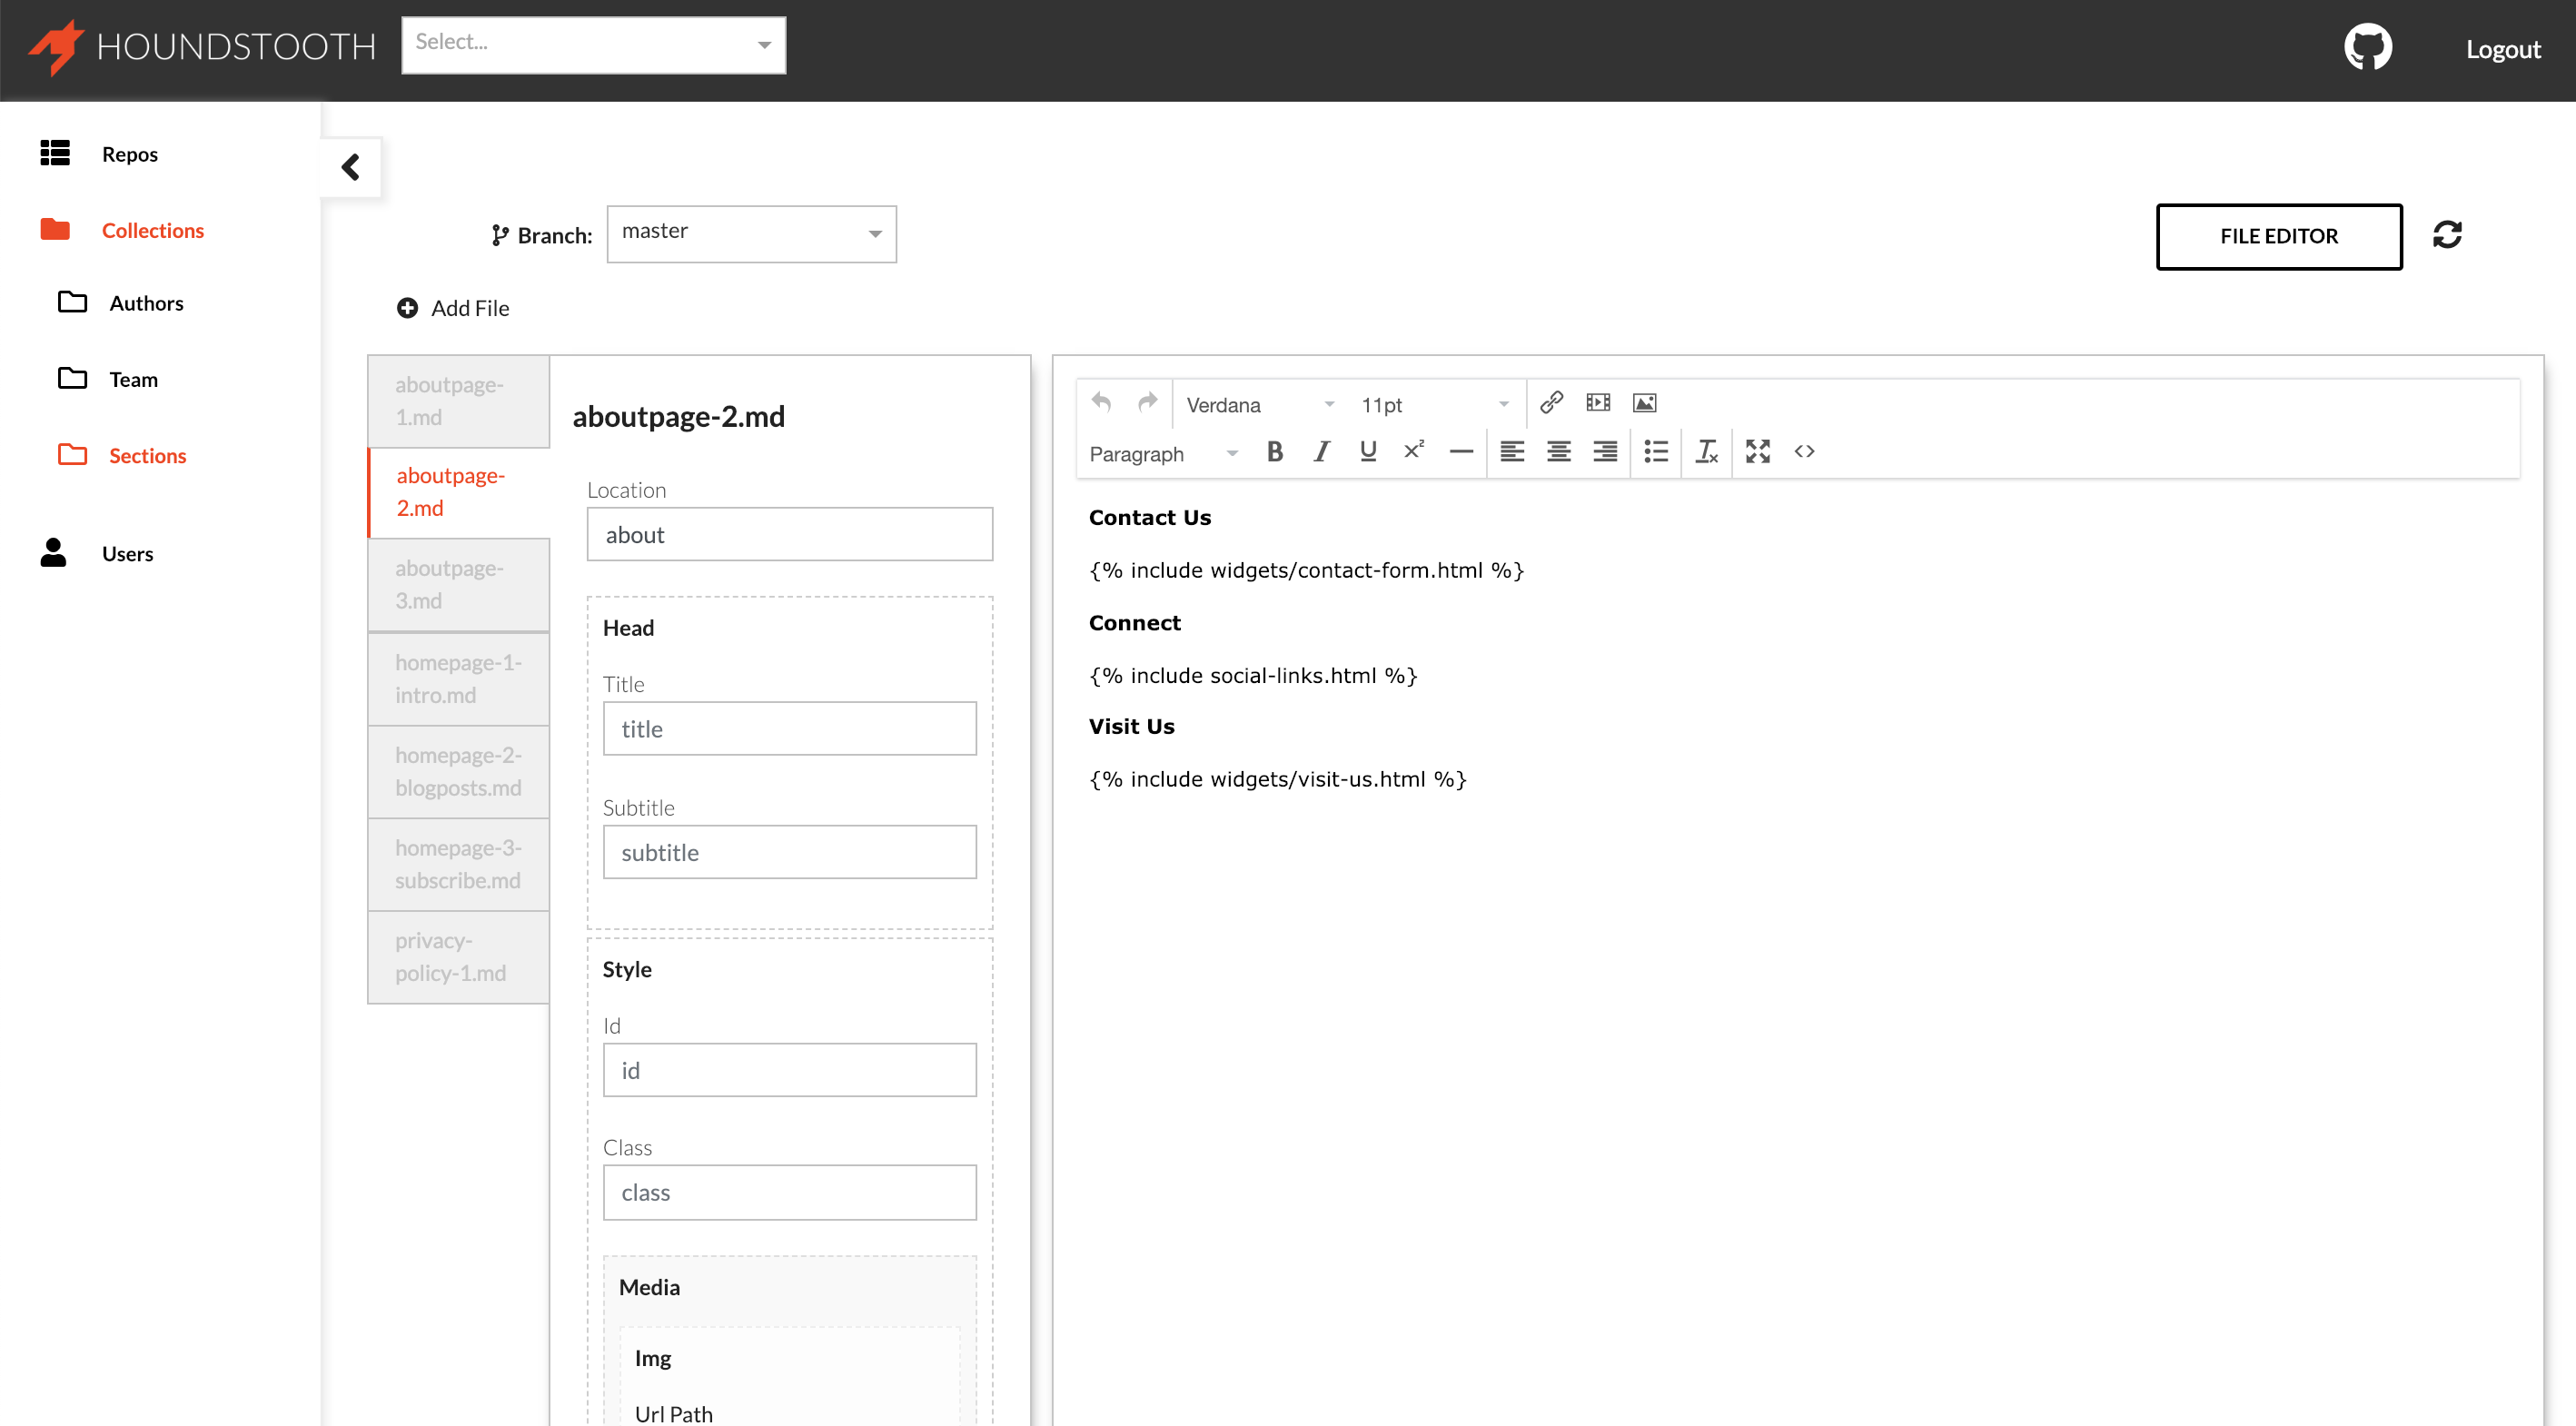
Houndstooth will detect any valid collection defined in your site _config.yml file and make it editable from your Houndstooth dashboard. Markdown files can be modified using an intuitive markdown editor. Or, you can use the collection editor to create and edit templated content using a form-based interface.
Changes made in your browser are saved as git commits, and will trigger a new site build on the Houndstooth server, making it easy to collaborate with less technical users while maintaining a git workflow.
Content Editor
Getting Started:
In order to use this feature, your site must be made with Jekyll and use Jekyll collection objects (including the default Jekyll Posts and Drafts collections).
Step 1: Defining a Collection
To define a collection, include it in your _config.yml as shown below. For more information on Jekyll collections, see their docs.
        collections:
          lander-1-col:
          output: true
          services:
          output: false
Once a collection has been defined, it will appear in the Houndstooth dashboard. Houndstooth will respect and recognize custom collection directory locations if a collection_dir: is set in your config_yml .
Step 2: Set up the form defaults
Building a custom form for content or post front matter is easy. The collection editor will generate a dynamic form from a _fields.md file in the root of the collection. Entry type and defaults are specified in yaml front matter. You can configure the form for strings, dates, timestamps, file uploads, color pickers, and more.
Example '_fields.md' File
        - - -
        name: null
        members_only: true
        date:
        ending_on:
        starting_at:
        featured_img_path:
        header_color:
        - - -
        Add text or liquid includes here.
Generated Form:
Each form field is defined from a key/value pair in the front matter of the _fields.md file. Read on for a full list of options.
Step 3. Provide Access
If you are providing access to a client or collaborator, please add that person with write access on your GitHub repo and then visit the “Users” page found on the left sidebar to view the users and access type.
Field conventions:
Any text you enter as a value in the _fields.md file will be used as a default. We recommend wrapping text in quotes (e.g. "Jack Dorsey"). A blank value, or the use of 'null' will render the option null.
Keys unique to a collection item and not present in the fields.md will only appear in new items cloned from the item containing the unique values.
Strings:
Most key/value pairs will render simple string variables you can use in your templates (e.g. name: "value" ). This will produce a text input in your form:
        - - -
        name: "Jack Dorsey"
        address: null
        - - -
Array:
To produce an editable array of strings, simply nest the variables in your front matter as show below. This will output an editable list of variables in the form:
          - - -
          categories:
            - Hello World
            - BowTie
          - - -
Boolean values:
Adding a value of true or false following the key in the yaml will produce a checkbox.
        - - -
        pattern: false
        parallax: true
        - - -
Date entry:
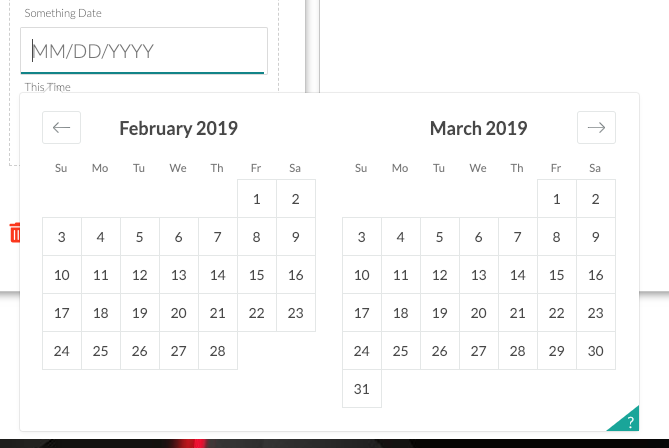
Using a key of date:, or appending _on to the end of a key will add a datepicker to the form. Additionally, using date: as a key value will add a time-stamp entry field. Using _on alone will produce the datepicker only (e.g. registered_on: "" ).
        - - -
        date:
        - - -
Time:
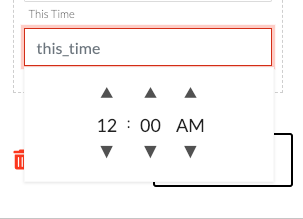
Appending _at: to the end of a key will create a time selector (e.g. starting_at: "").
        - - -
        start-time_at:
        - - -
File uploads:
If you want to produce a file upload interface, append ‘_path’ to the key value (e.g. featured_img_path: "" ). This will provide a file upload interface. Most image files will preview for your end user once uploaded. Files too large to preview (over 2MB), and nonimage files will render an icon.
        - - -
        avatar_path:
        - - -
Image files will generate a preview:
Color picker:
To provide a color picker interface in your form append _color: to the key (e.g. header_color: "" ). Selections are returned as six character hex values.
        - - -
        section_color:
        - - -
Text Areas:
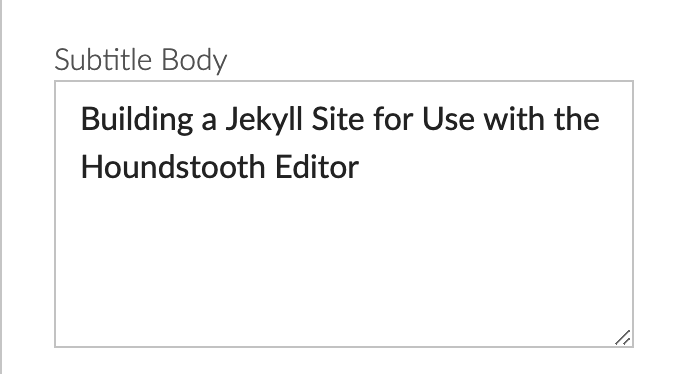
For longer format text based fields, you may want to provide a scalable textarea in your form. To provide a text area instead of a string, use the key content or append ‘_content’ ‘_body’ ‘_textarea’ to your key (e.g. header_color: "" ). Selections are returned as six character hex values.
        - - -
        subtitle_body:
        - - -
Other Editing Options:
File Editor
For more advanced cloud editing, you can leverage the buit in File Editor interface to access and modify every file in your repository. The file editor will recognize formatting using HTML or Markdown, while the collections editor will not.
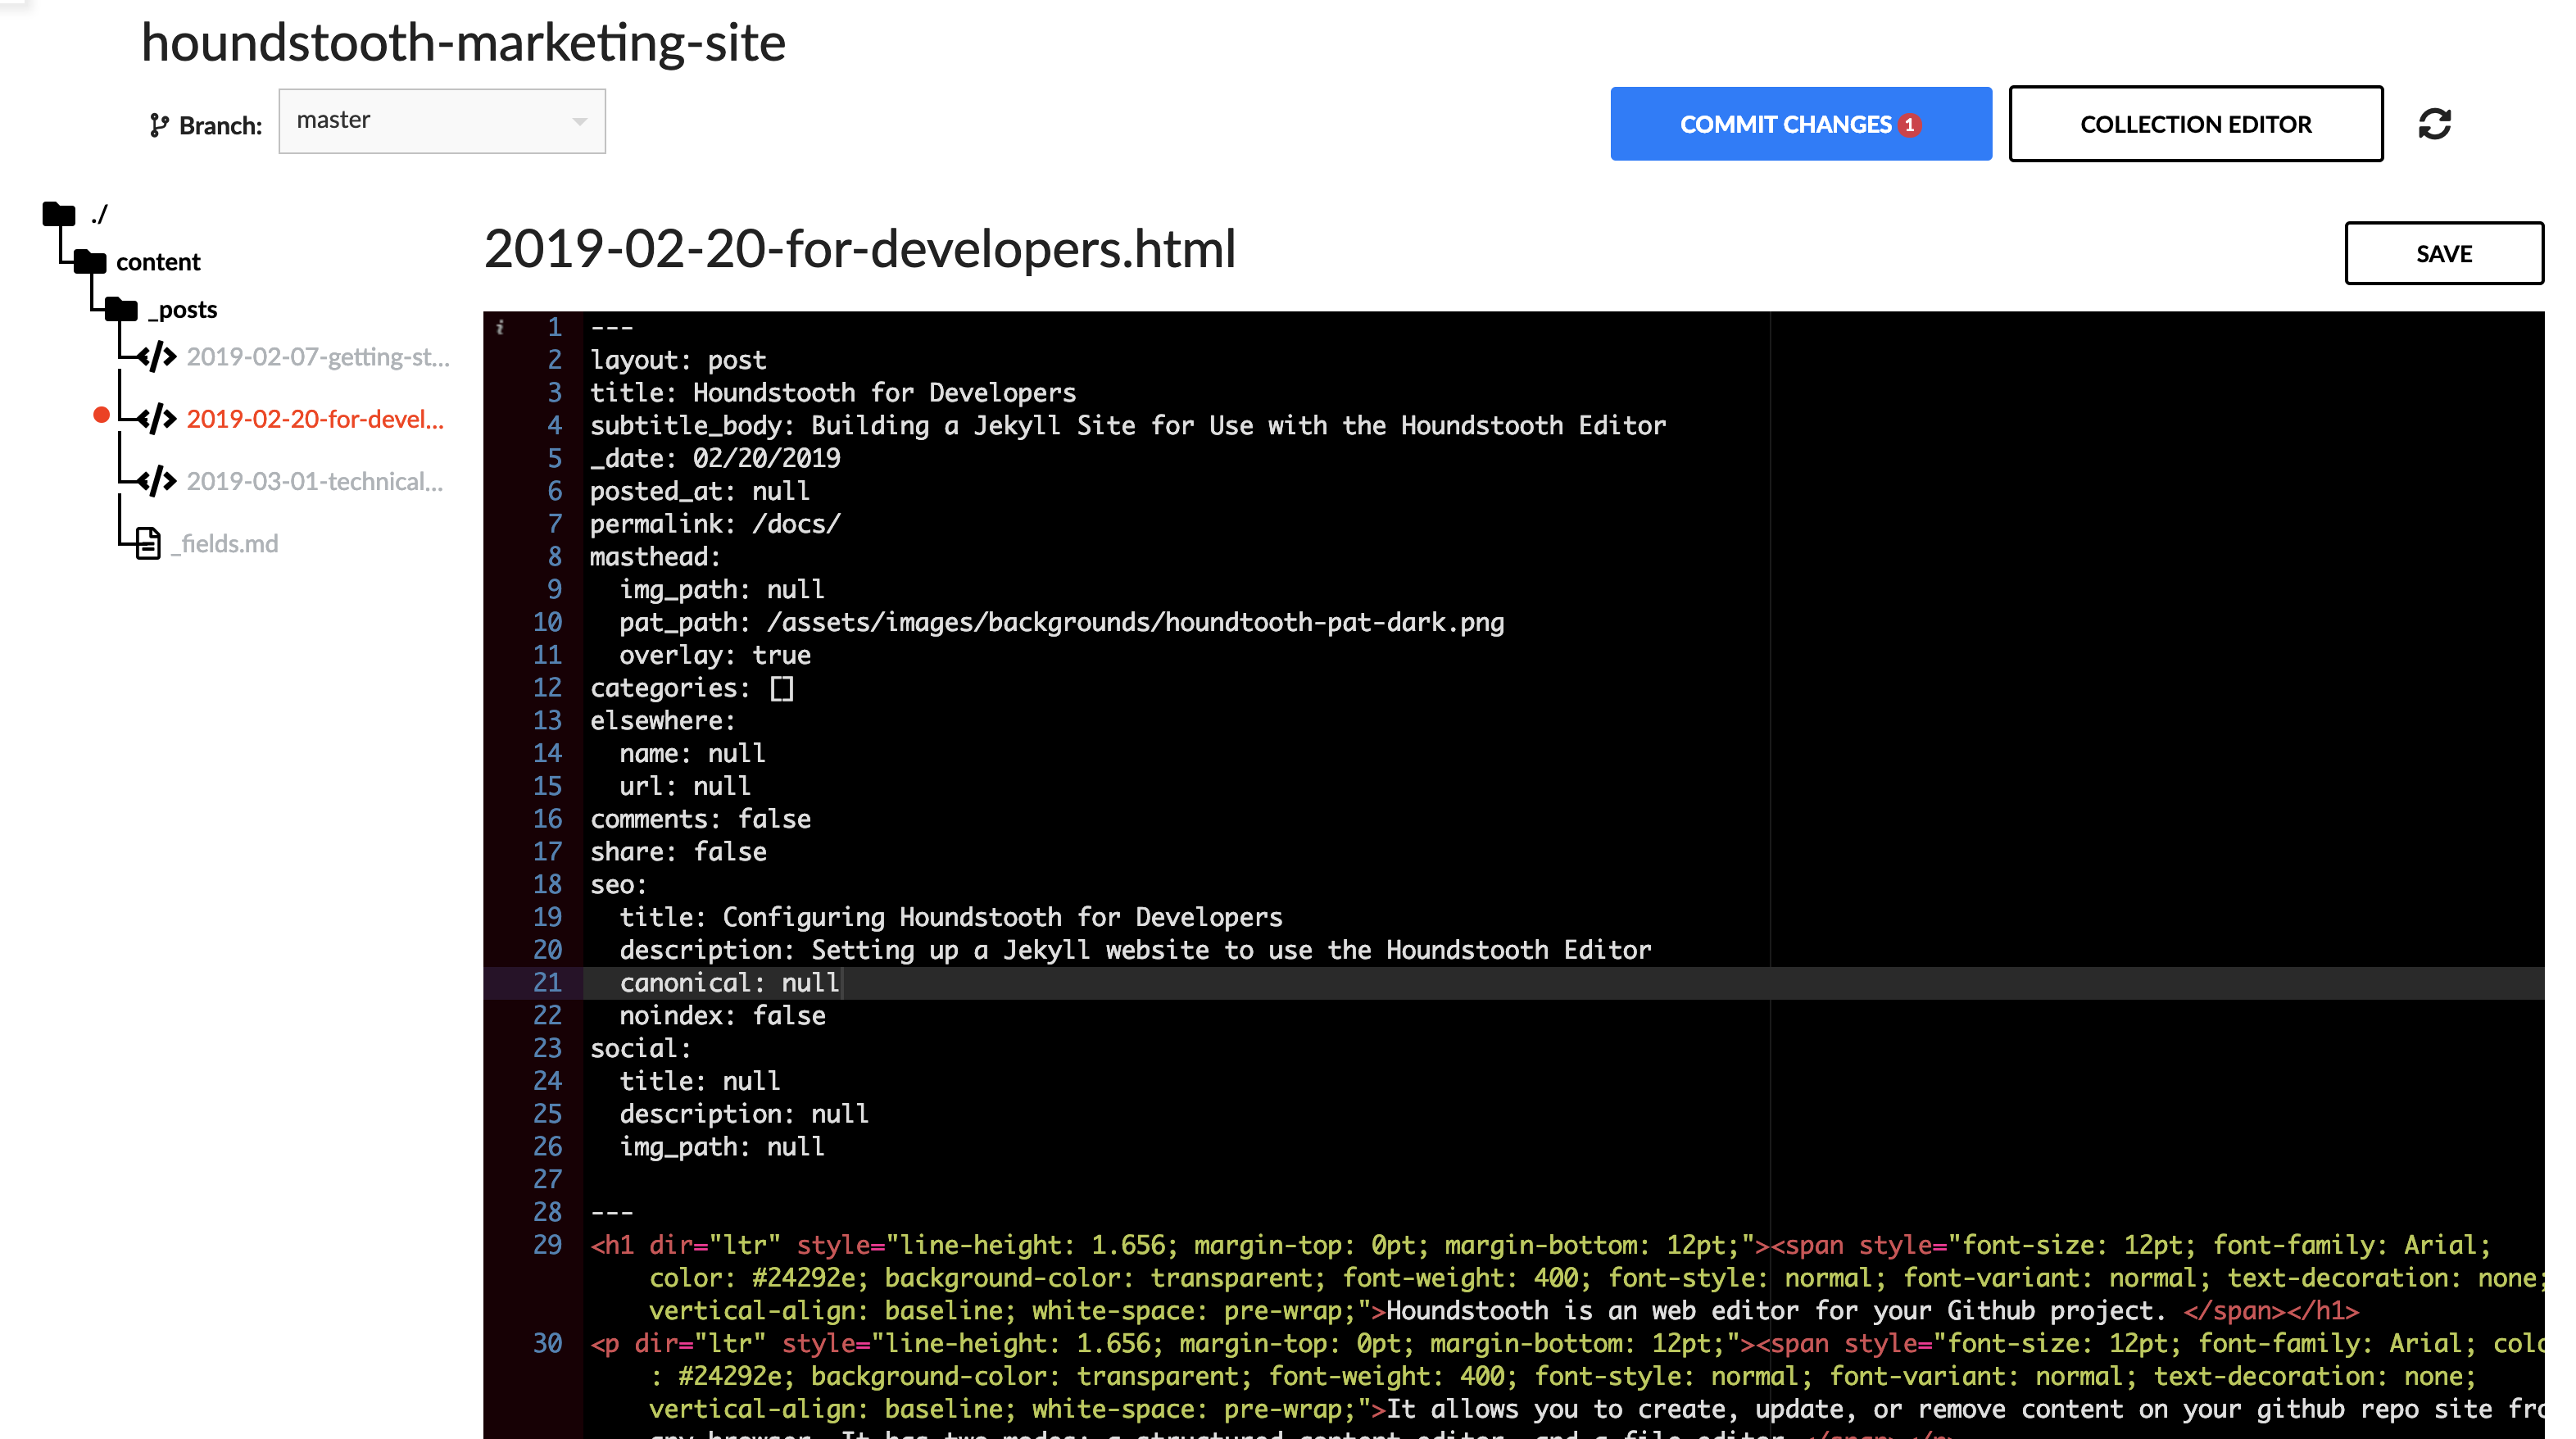
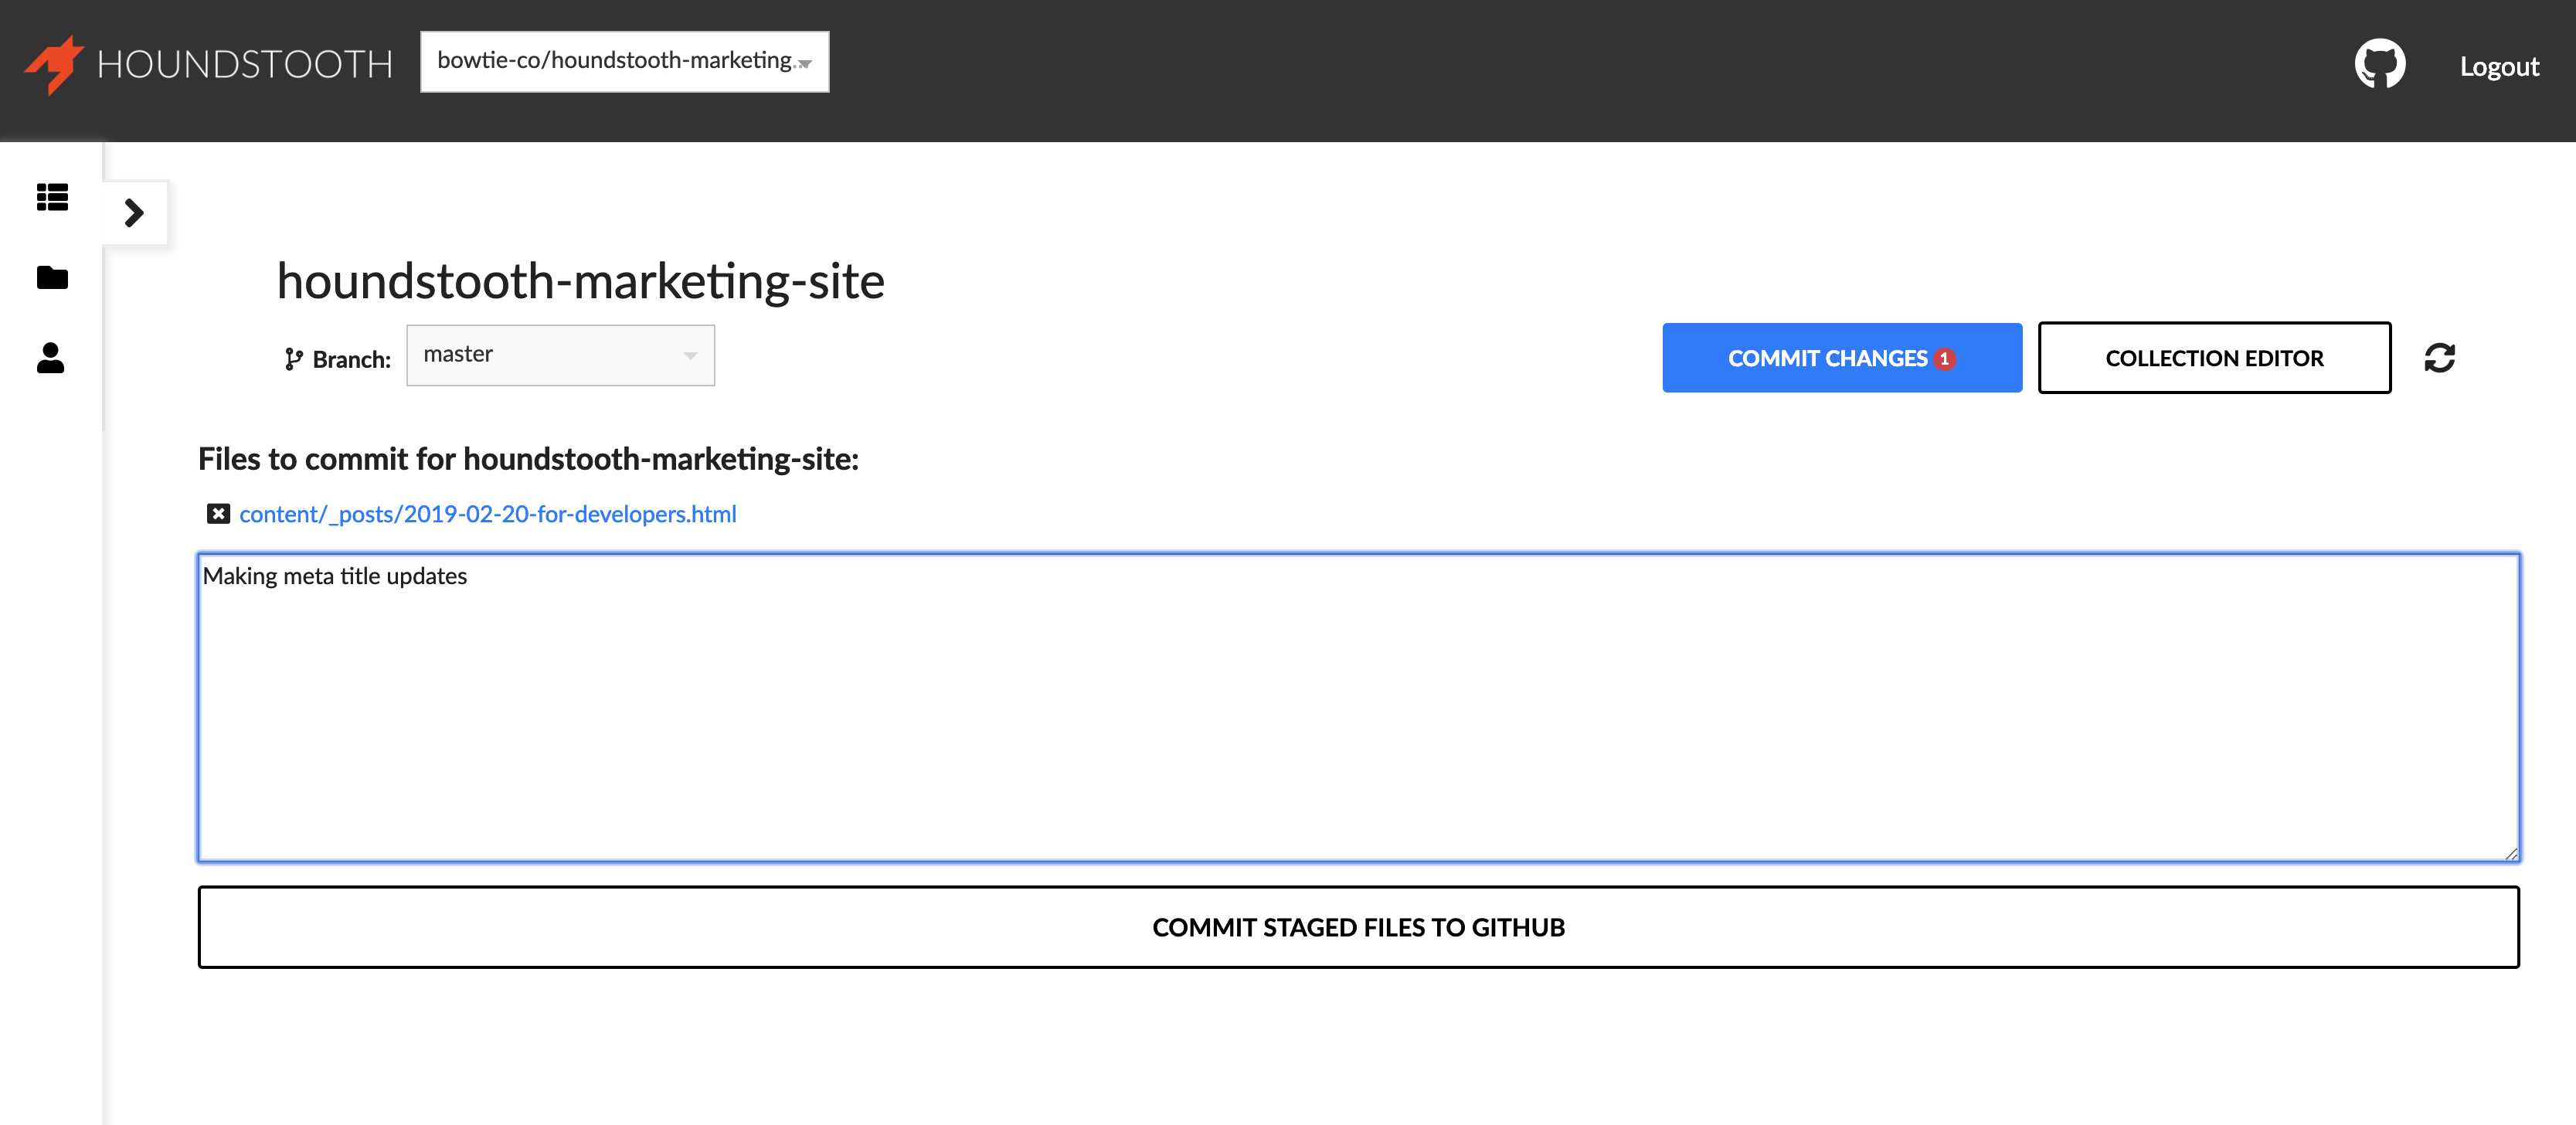
Editor is built using Ace Editor. The workflow is a simplified git workflow. Each edit will be staged, until commited to the repo using the Commit button.
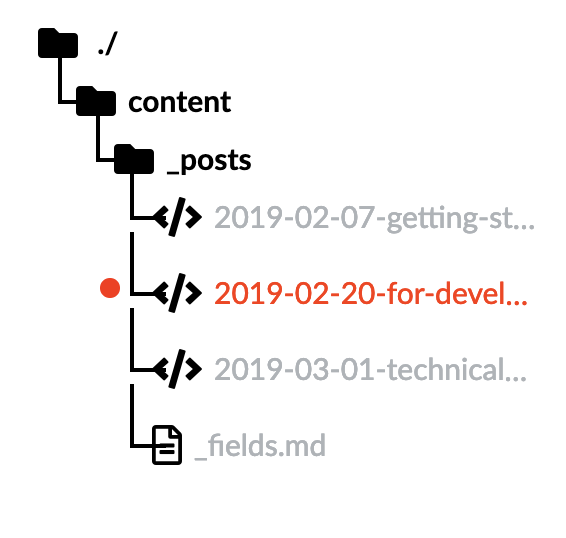
Updated (saved) files will be highlighted with a red indicator. Additionally, the 'Commit Changes' button will appear and show the number of staged edits to be committed.

You can also leverage the File Editor to drag and drop images into your Github repository. Please note: these files will post to GH via the API, so they do not respect LFS if enabled.
Working Locally
Additionally, you can configure your website to use Houndstooth locally using the editor of your choice. Simply clone your repo, add the appropriate _fields.md files and key variables, and push commits via git. Once the remote updates, Houndstooth will load the collections as configured.
=======
Houndstooth is a web editor for your Github project.
It allows you to create, update, or remove content on your github repo site from any browser. It has two modes: a structured content editor, and a file editor.
The content editor is designed for use with Jekyll. It's ideal for content that changes often, marketing copy, blog posts, and content with a similar format that is frequently repeated. The file editor allows for more advanced formatting with HTML or Markdown.
Similar to other Jekyll collection editors, Houndstooth uses collections to make it easy for web developers to customize the editing interface for clients and non-technical collaborators.
This guide will show you how to do structure your Jekyll project for use with the Content Editor, and access the File Editor.
How it Works
Houndstooth will detect any valid collection defined in your site _config.yml file and make it editable from your Houndstooth dashboard. Markdown files can be modified using an intuitive markdown editor. Or, you can use the collection editor to create and edit templated content using a form-based interface.
Changes made in your browser are saved as git commits, and will trigger a new site build on the Houndstooth server, making it easy to collaborate with less technical users while maintaining a git workflow.
Content Editor

Getting Started:
In order to use this feature, your site must be made with Jekyll and use Jekyll collection objects (including the default Jekyll Posts and Drafts collections).
Step 1: Defining a Collection
To define a collection, include it in your _config.yml as shown below. For more information on Jekyll collections, see their docs.
        collections:
          lander-1-col:
          output: true
          services:
          output: false
Once a collection has been defined, it will appear in the Houndstooth dashboard. Houndstooth will respect and recognize custom collection directory locations if a collection_dir: is set in your config_yml .
Step 2: Set up the form defaults
Building a custom form for content or post front matter is easy. The collection editor will generate a dynamic form from a _fields.md file in the root of the collection. Entry type and defaults are specified in yaml front matter. You can configure the form for strings, dates, timestamps, file uploads, color pickers, and more.
Example '_fields.md' File
        - - -
        name: null
        members_only: true
        date:
        ending_on:
        starting_at:
        featured_img_path:
        header_color:
        - - -
        Add text or liquid includes here.
Generated Form:
Each form field is defined from a key/value pair in the front matter of the _fields.md file. Read on for a full list of options.
Step 3. Provide Access
If you are providing access to a client or collaborator, please add that person with write access on your GitHub repo and then visit the “Users” page found on the left sidebar to view the users and access type.
Field conventions:
Any text you enter as a value in the _fields.md file will be used as a default. We recommend wrapping text in quotes (e.g. "Jack Dorsey"). A blank value, or the use of 'null' will render the option null.
Keys unique to a collection item and not present in the fields.md will only appear in new items cloned from the item containing the unique values.
Strings:
Most key/value pairs will render simple string variables you can use in your templates (e.g. name: "value" ). This will produce a text input in your form:
        - - -
        name: "Jack Dorsey"
        address: null
        - - -
Array:
To produce an editable array of strings, simply nest the variables in your front matter as show below. This will output an editable list of variables in the form:
          - - -
          categories:
            - Hello World
            - BowTie
          - - -
Boolean values:
Adding a value of true or false following the key in the yaml will produce a checkbox.
        - - -
        pattern: false
        parallax: true
        - - -
Date entry:
Using a key of date:, or appending _on to the end of a key will add a datepicker to the form. Additionally, using date: as a key value will add a time-stamp entry field. Using _on alone will produce the datepicker only (e.g. registered_on: "" ).
        - - -
        date:
        - - -

Time:
Appending _at: to the end of a key will create a time selector (e.g. starting_at: "").
        - - -
        start-time_at:
        - - -

File uploads:
If you want to produce a file upload interface, append ‘_path’ to the key value (e.g. featured_img_path: "" ). This will provide a file upload interface. Most image files will preview for your end user once uploaded. Files too large to preview (over 2MB), and nonimage files will render an icon.
        - - -
        avatar_path:
        - - -
Image files will generate a preview:
Color picker:
To provide a color picker interface in your form append _color: to the key (e.g. header_color: "" ). Selections are returned as six character hex values.
        - - -
        section_color:
        - - -
Text Areas:
For longer format text based fields, you may want to provide a scalable textarea in your form. To provide a text area instead of a string, use the key content or append ‘_content’ ‘_body’ ‘_textarea’ to your key (e.g. header_color: "" ). Selections are returned as six character hex values.
        - - -
        subtitle_body:
        - - -

Other Editing Options:
File Editor
For more advanced cloud editing, you can leverage the buit in File Editor interface to access and modify every file in your repository. The file editor will recognize formatting using HTML or Markdown, while the collections editor will not.

Editor is built using Ace Editor. The workflow is a simplified git workflow. Each edit will be staged, until commited to the repo using the Commit button.
Updated (saved) files will be highlighted with a red indicator. Additionally, the 'Commit Changes' button will appear and show the number of staged edits to be committed.


You can also leverage the File Editor to drag and drop images into your Github repository. Please note: these files will post to GH via the API, so they do not respect LFS if enabled.

Working Locally
Additionally, you can configure your website to use Houndstooth locally using the editor of your choice. Simply clone your repo, add the appropriate _fields.md files and key variables, and push commits via git. Once the remote updates, Houndstooth will load the collections as configured.